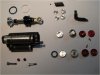
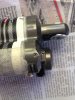
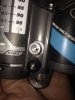
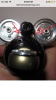
So... I have managed to service my Equalizer 3 (since there was no way I was going to wait 30-60 days to have it shipped to the US for service/warranty) and fixed the non-retracting shaft issue. Took me a whole afternoon... but I have figured out how to service them. Its not that hard, once you get the hang of it.
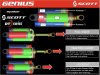
This applies to all Scott Genius and Genius LT made from 2011 to 2013. I suspect the same principles apply to older DT Equalizers.
If there is enough people interested, I´ll post a tutorial.
Cheers....
This applies to all Scott Genius and Genius LT made from 2011 to 2013. I suspect the same principles apply to older DT Equalizers.
If there is enough people interested, I´ll post a tutorial.
Cheers....
Last edited: