Quantcast

brooklyn diargram

Nov 5, 2004
202
38
hartlepool, uk
im just waiting on some frame spacers/plastic bits for my racelink to come and wondered if anyone had any diagrams on the frame.
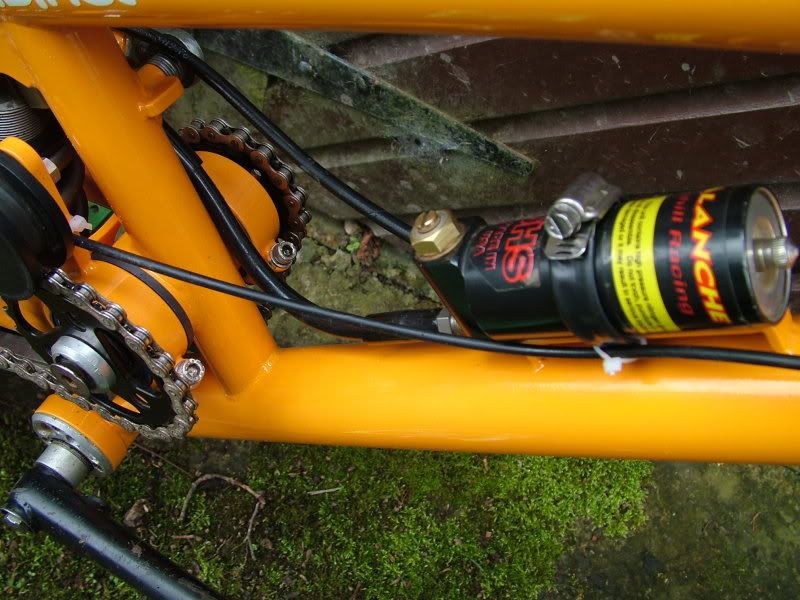
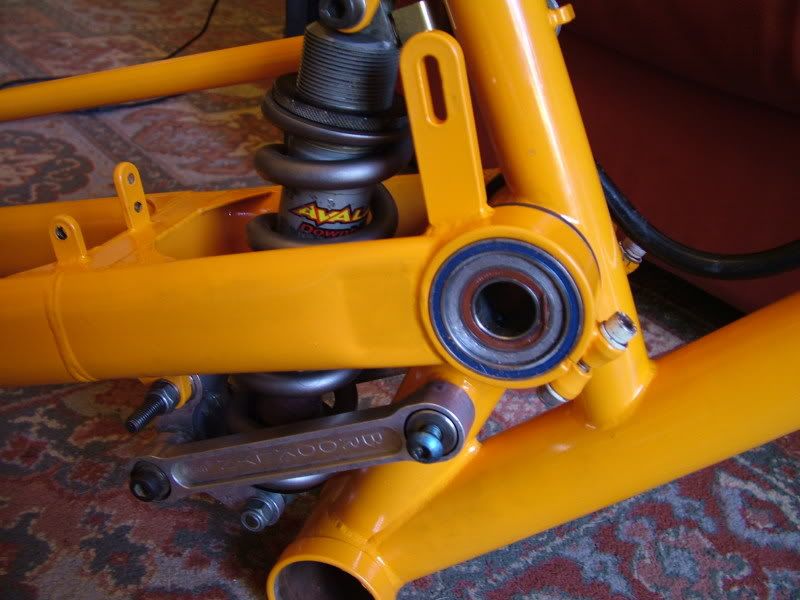
some close ups of the jackshaft area showing the bits would probably do me. had a search around but cant find anything of use.

unfortunately ive been waiting a while for the bits and cant remember which order they went in!

thanks, any help is great
 

John@UKMB

Chimp
Sep 13, 2009
14
0
I dont have a diagram but I did have my old Racelink in bits to be powdercoated. You will have to bear with me because this is all from memory, at the time I had trouble contacting Brooklyn and their forum wasnt working so if there is anything that people dont see as being right it is the way I did it as an engineer.

It sounds like youve managed to press everything out to get it apart and thats most of the battle over with, this is easier with two people.

To put it back together I put the aluminium main pivot in the freezer for a few hours to shrink it a bit, this makes it a hell of a lot easier to rebuild, i think the freezer was on -18 degrees C.

Sit the two nylon spacers over the main pivot tube on the front end, one side of each spacer has a groove machined which allows the rings to sit over the tube.

Slide the swingarm over the nylon spacers so everything is in line.

Take the aluminium main pivot out of the freezer, put a bit of antiseize grease on it and tap it through one side of the swingarm using a soft mallet until it is in the middle.

While the pivot is still cold take your 4 main pivot bearings and tap them in gently over the aluminium main pivot and under the clamping rings on the swingarm. there should be 2 of these per side. The swingarm is now attached.

Leave to warm to room temperature again and the aluminium pivot will expand back to its proper size making a good fit inside the front end and the pivot bearings. Once it is at room temperature you can tighten the clamps around the bearings.

Then it is just a case of gently tapping the jackshaft bearings back inside the main pivot tube and fitting the jackshaft axle etc...

Il try to find some pics from when I had it assembled but I didnt think to get any step by step ones as it was in bits.

I hope this is some help.
 
Nov 5, 2004
202
38
hartlepool, uk
thanks
thats really good,
i never thought about popping it in the freezer but will be doing so now!

with regard to the plastic spacers where does the plastic spacer with the groove go,

does the groove/step face inwards or outwards?


on the left hand side, where the linkage plates fit the frame, the bearing there should be the smaller of the two sizes and the smaller size inside tube? is that right or should it be a bigger one like the one that fits on the rear end?

thanks again
 

John@UKMB

Chimp
Sep 13, 2009
14
0
I left mine in the freezer for about 1.5 hours

Both of the nylon spacers have grooves, the groves are on the inside and make the nylon spacers sit around the tube on the front end. In the picture below they are the dark rings between the frame and swingarm. Yours may be a different colour because I machined those ones myself out of the grade of nylon I had in stock.


In the pic below you can see a side on view of that area when it was built minus jackshaft.

The red ring is the seal on the jackshaft bearings.

The silver ring is the aluminium of the main pivot.

The blue ring is the seal on the larger main pivot bearings.


Remember: If going for the freezing method you must wait for the main pivot to be back to room temperature before you try to fit the internal jackshaft bearings, when frozen the hole for the bearings will be too small.

Im not quite sure what you mean about the linkages, could you get a pic of the bit you mean? Cheers.
 
Nov 5, 2004
202
38
hartlepool, uk
thats great, think i should hopefully be able to put it back together in some sort of correct fashion now!
with the linkages the pictures answer all the questions i had, and a few more i never asked [eg routing of the avalanche!]
cheers for the info, now i need to lock myself in a room with the bike and build it...